Today, we are going to take a look at how to add glow-on text or icons in Final Cut Pro.
Let’s start with text.
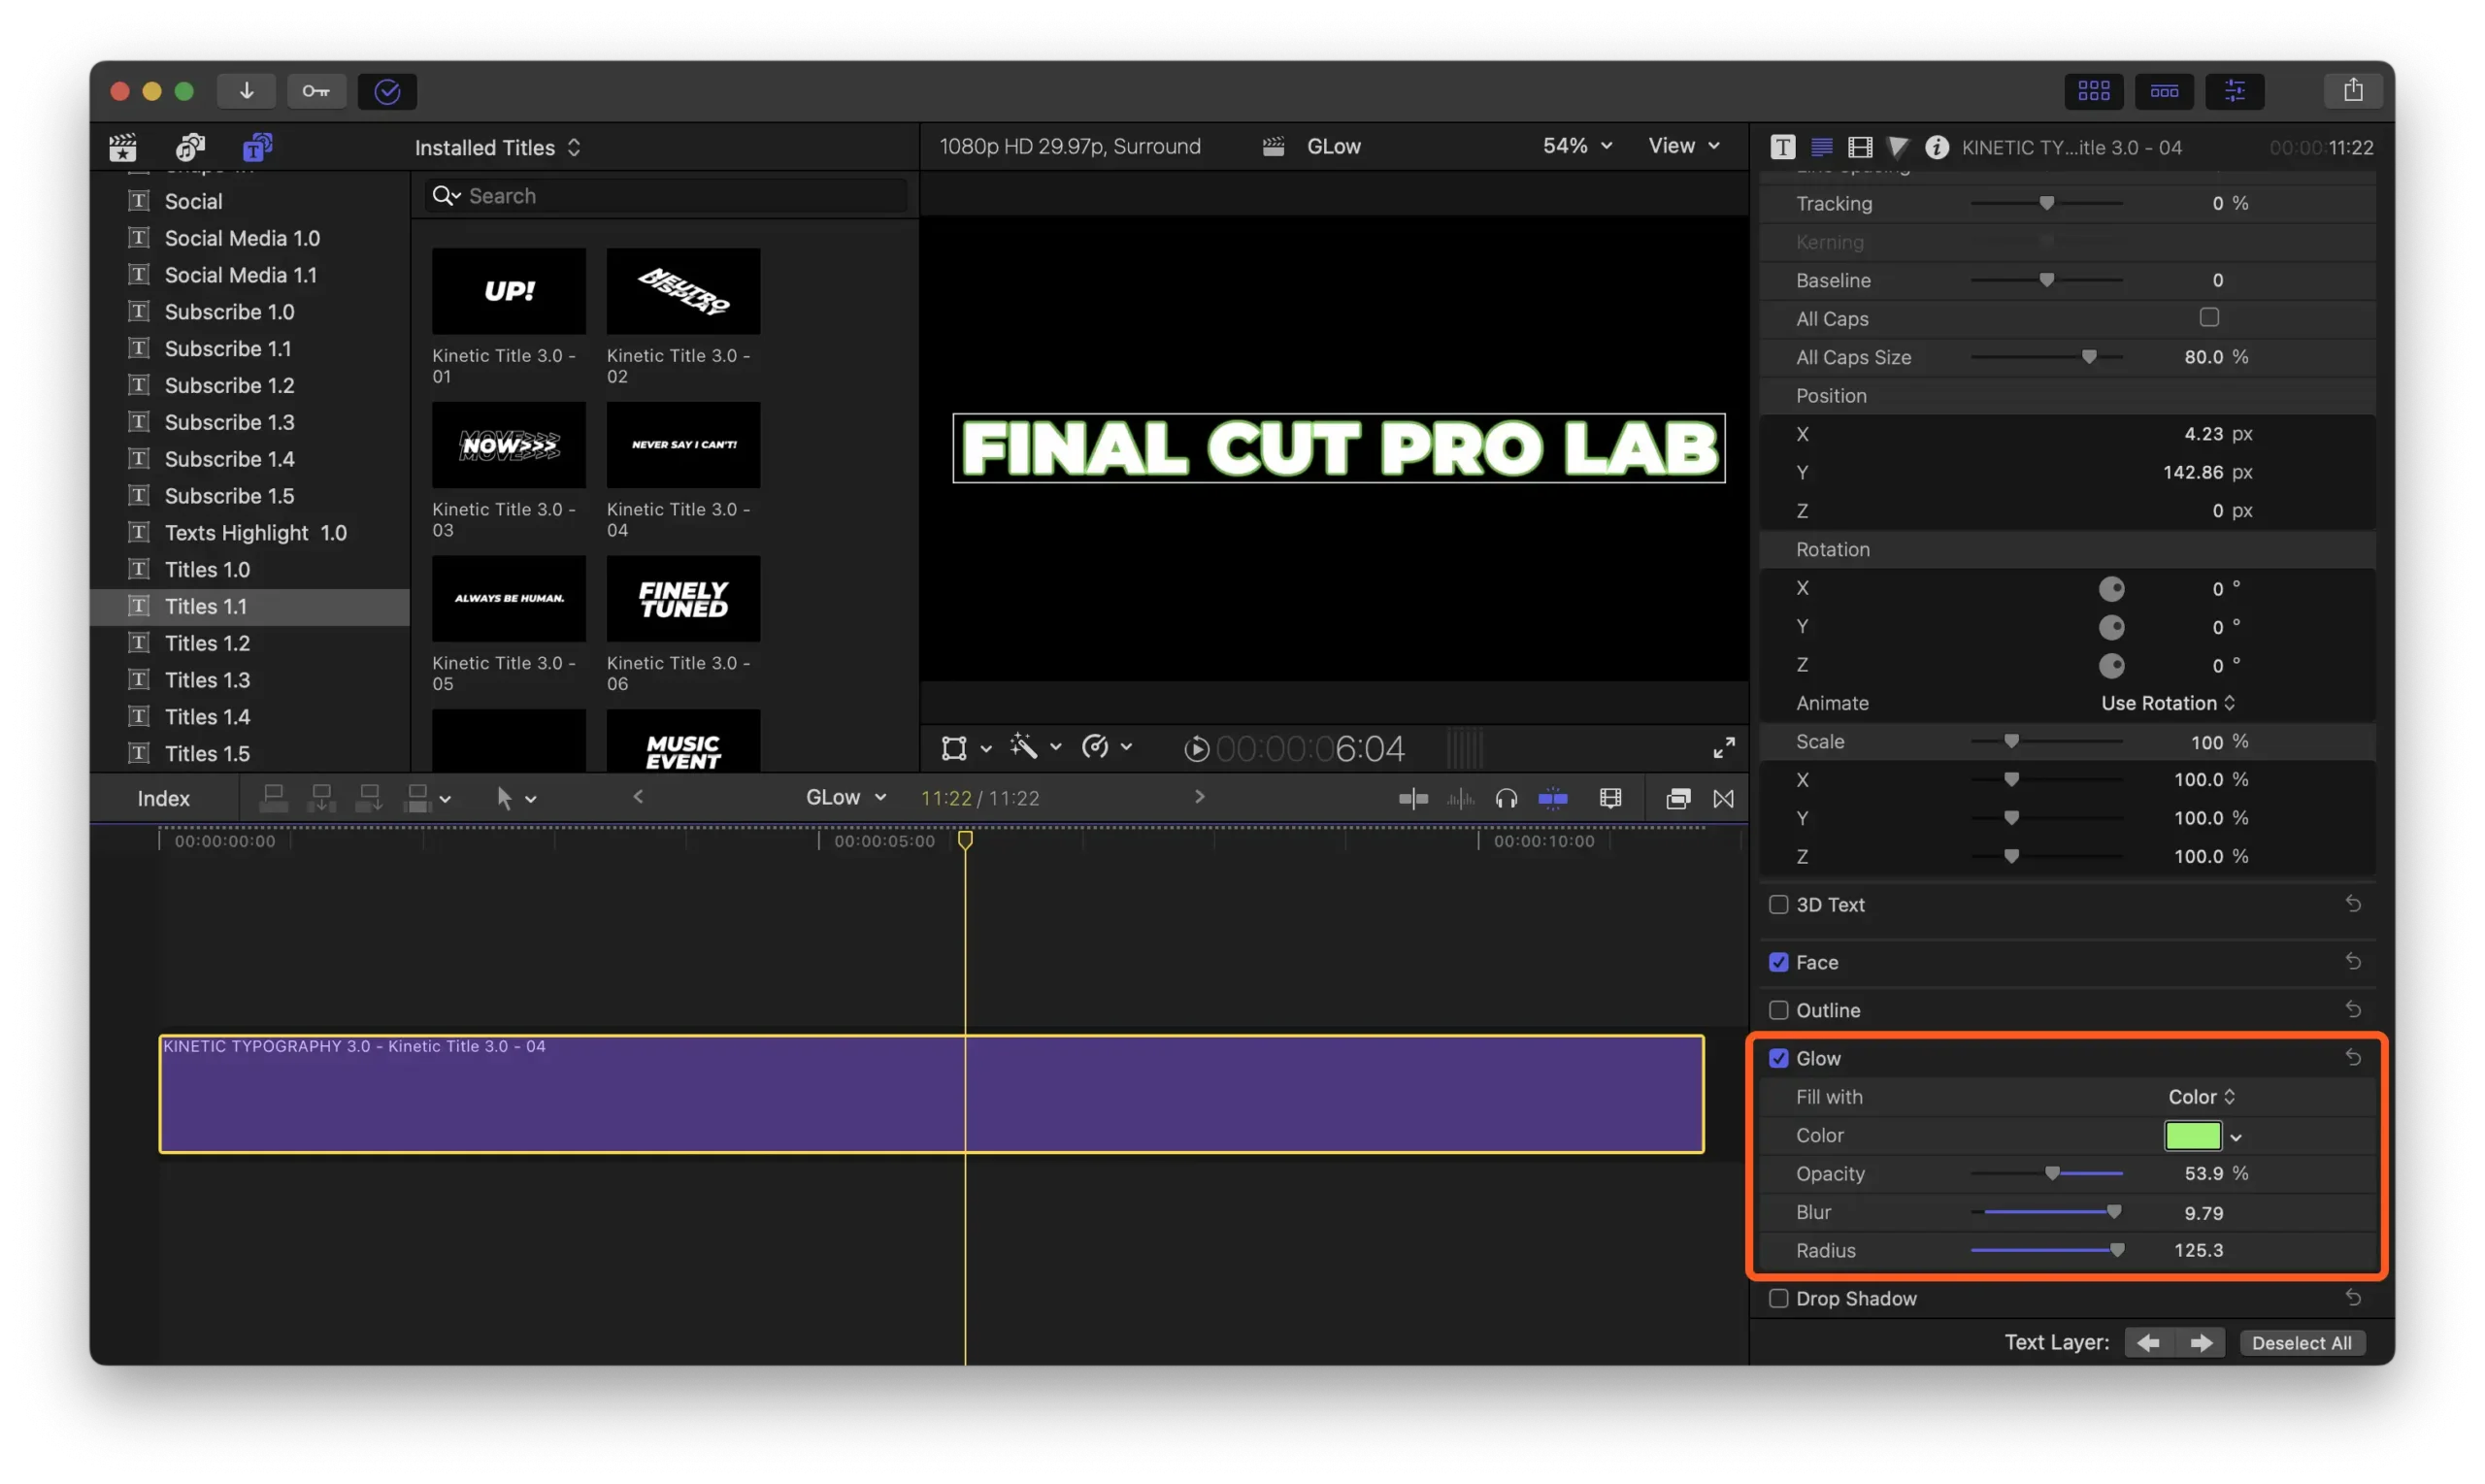
The easiest way to add a glow to your text is in the text inspector. Scroll down to the bottom and select the glow checkbox. Click on the show button to the right to adjust the appearance of this effect. You can change the glow color and adjust the radius, blur amount, and opacity, but you’re somewhat limited in what you can do.
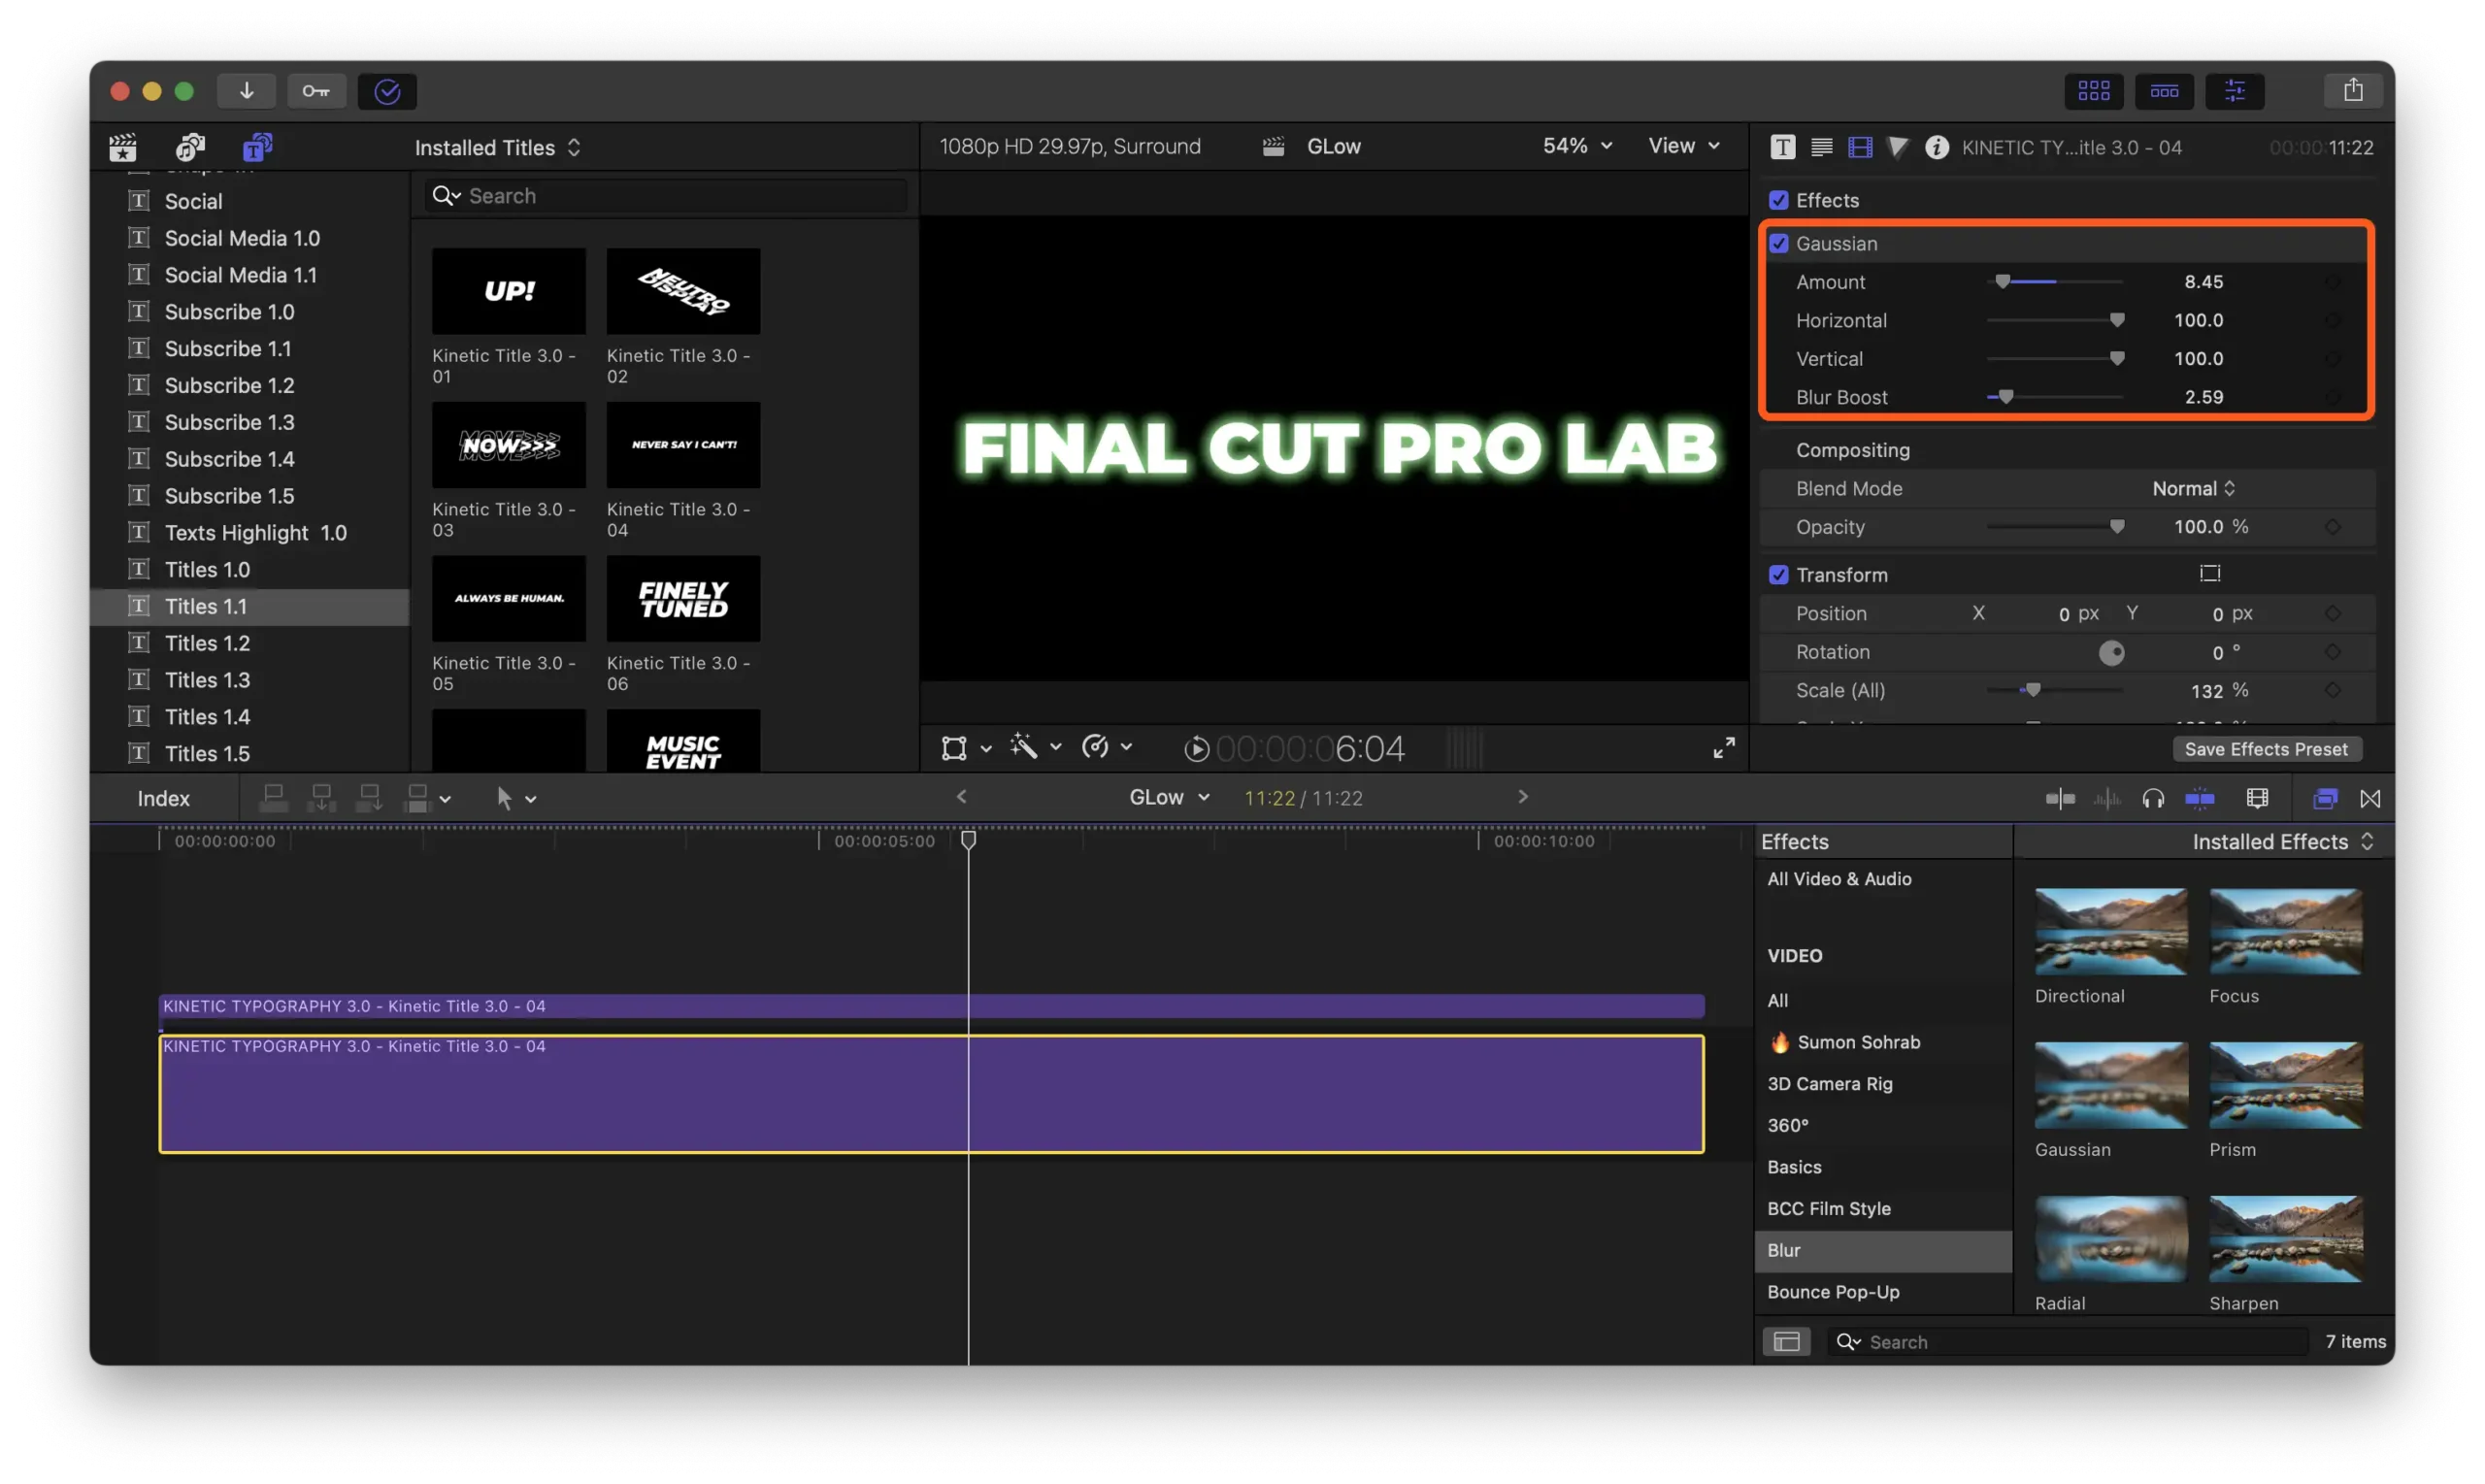
Don’t worry; we have a better way to add glow to your text. Select your title clip, hold down the (⌥) option key, and drag it up to make a copy of it. With the top copy selected, press V to disable it for now, and select the bottom copy. Go to the text inspector and change the color of your text to the color you want your glow to be.
“You can use a solid color or get fancy and use a gradient.”
If you want more colors, double-click on the gradient bar to add another color well and select a color for it. Drag these control points either way to adjust the color position in the gradient, or move the arrows between the control points to adjust the mix of colors. You can also adjust the angle of your gradient by using this angle dial.
Next, go to your effects browser and select the blurs category. Grab the Gaussian Blur effect and add it to your bottom clip. Re-enable your top clip. Select the bottom clip again and adjust the blur amount to increase or decrease the glow. Use the Blur Boost slider to add even more.
“As you can see, doing it this way gives you quite a bit more flexibility.”
Let’s take a look at adding a glow to an icon.
Here you have a couple of options too. If you want the glow to be the same color as your icon, it’s similar to what we did before. Make a copy of your clip, layer it directly above your original, and disable it by pressing V on your keyboard. Select your bottom clip and first make it into a compound clip (⌥+G). This will prevent the edges from being cut off. If you go too far, grab the Gaussian Blur effect, add it to your bottom clip, and re-enable your top clip. Select the bottom clip again and use the Amount and Blur Boost sliders to set the amount of glow and make it glow even more. With your bottom clip selected, go to the Color Inspector and bring up the Global Exposure and Saturation sliders.
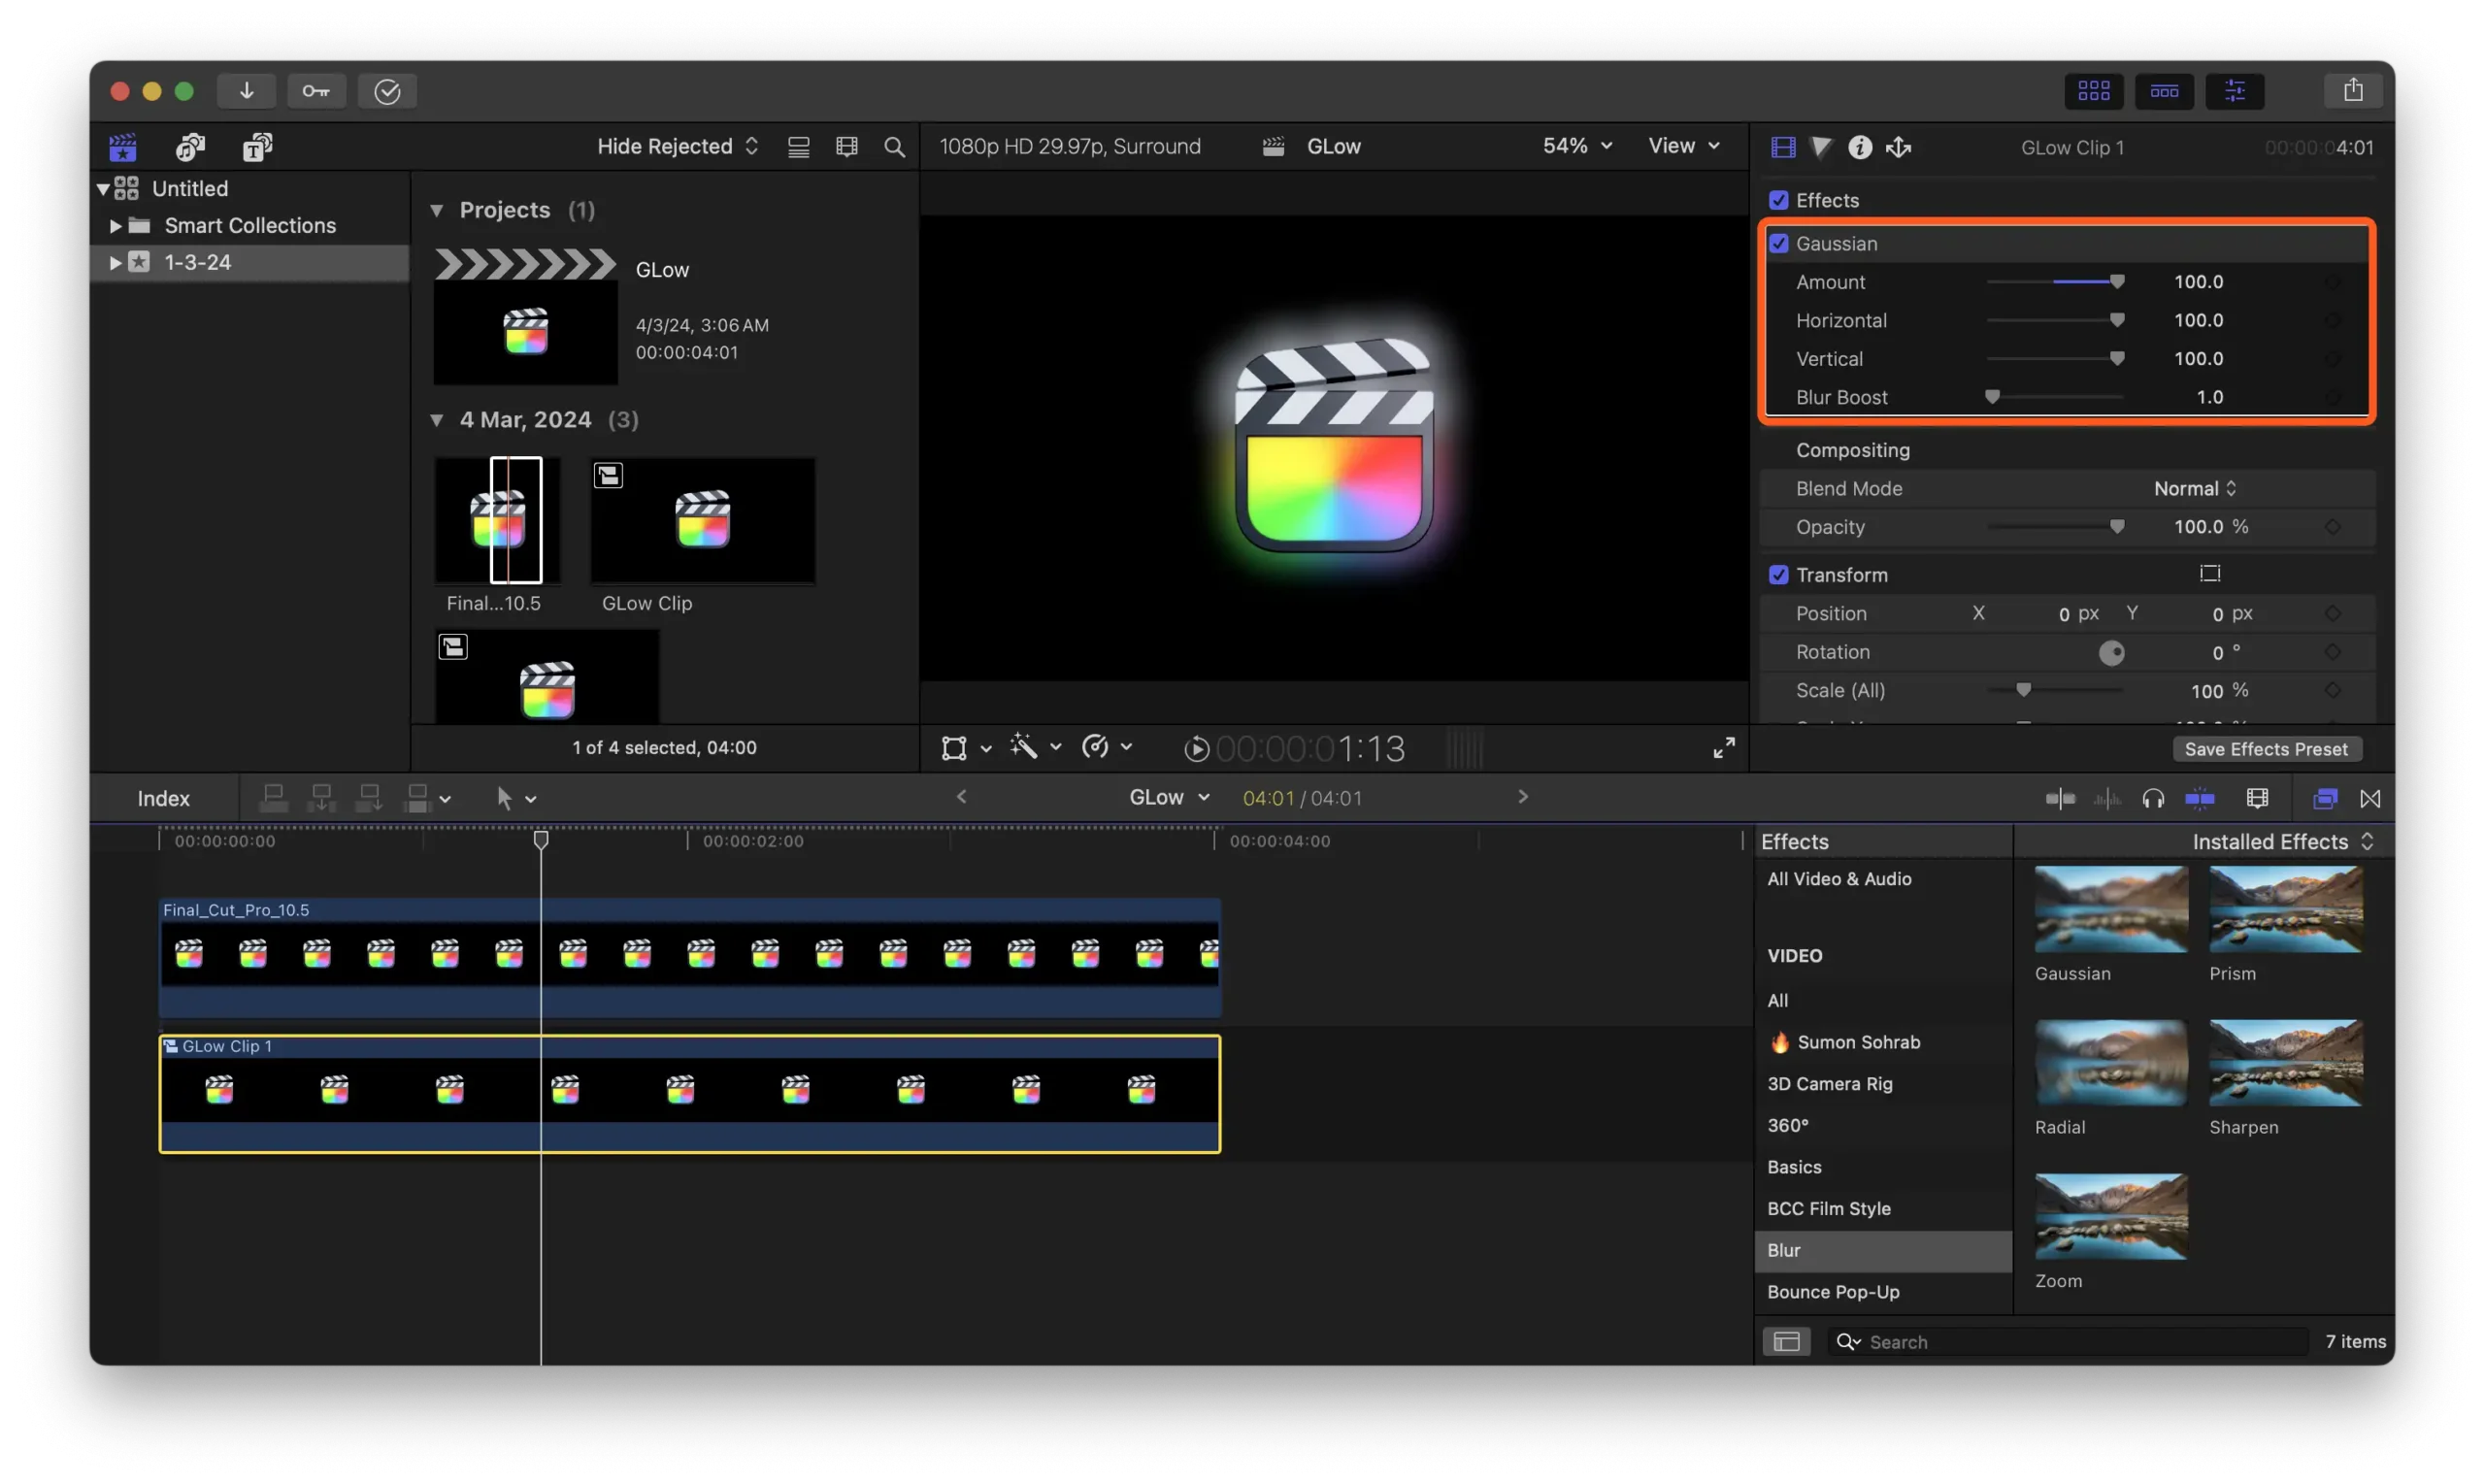
If you want the Glow effect to be a different color than your icon, this is a bit different. Make a copy of your icon clip, disable the top copy, and select the bottom clip again. Go to the effects browser, select the color category, and add the colorize effect to your bottom clip. In the Inspector window, click on the top color well and select the color you want for your glow.
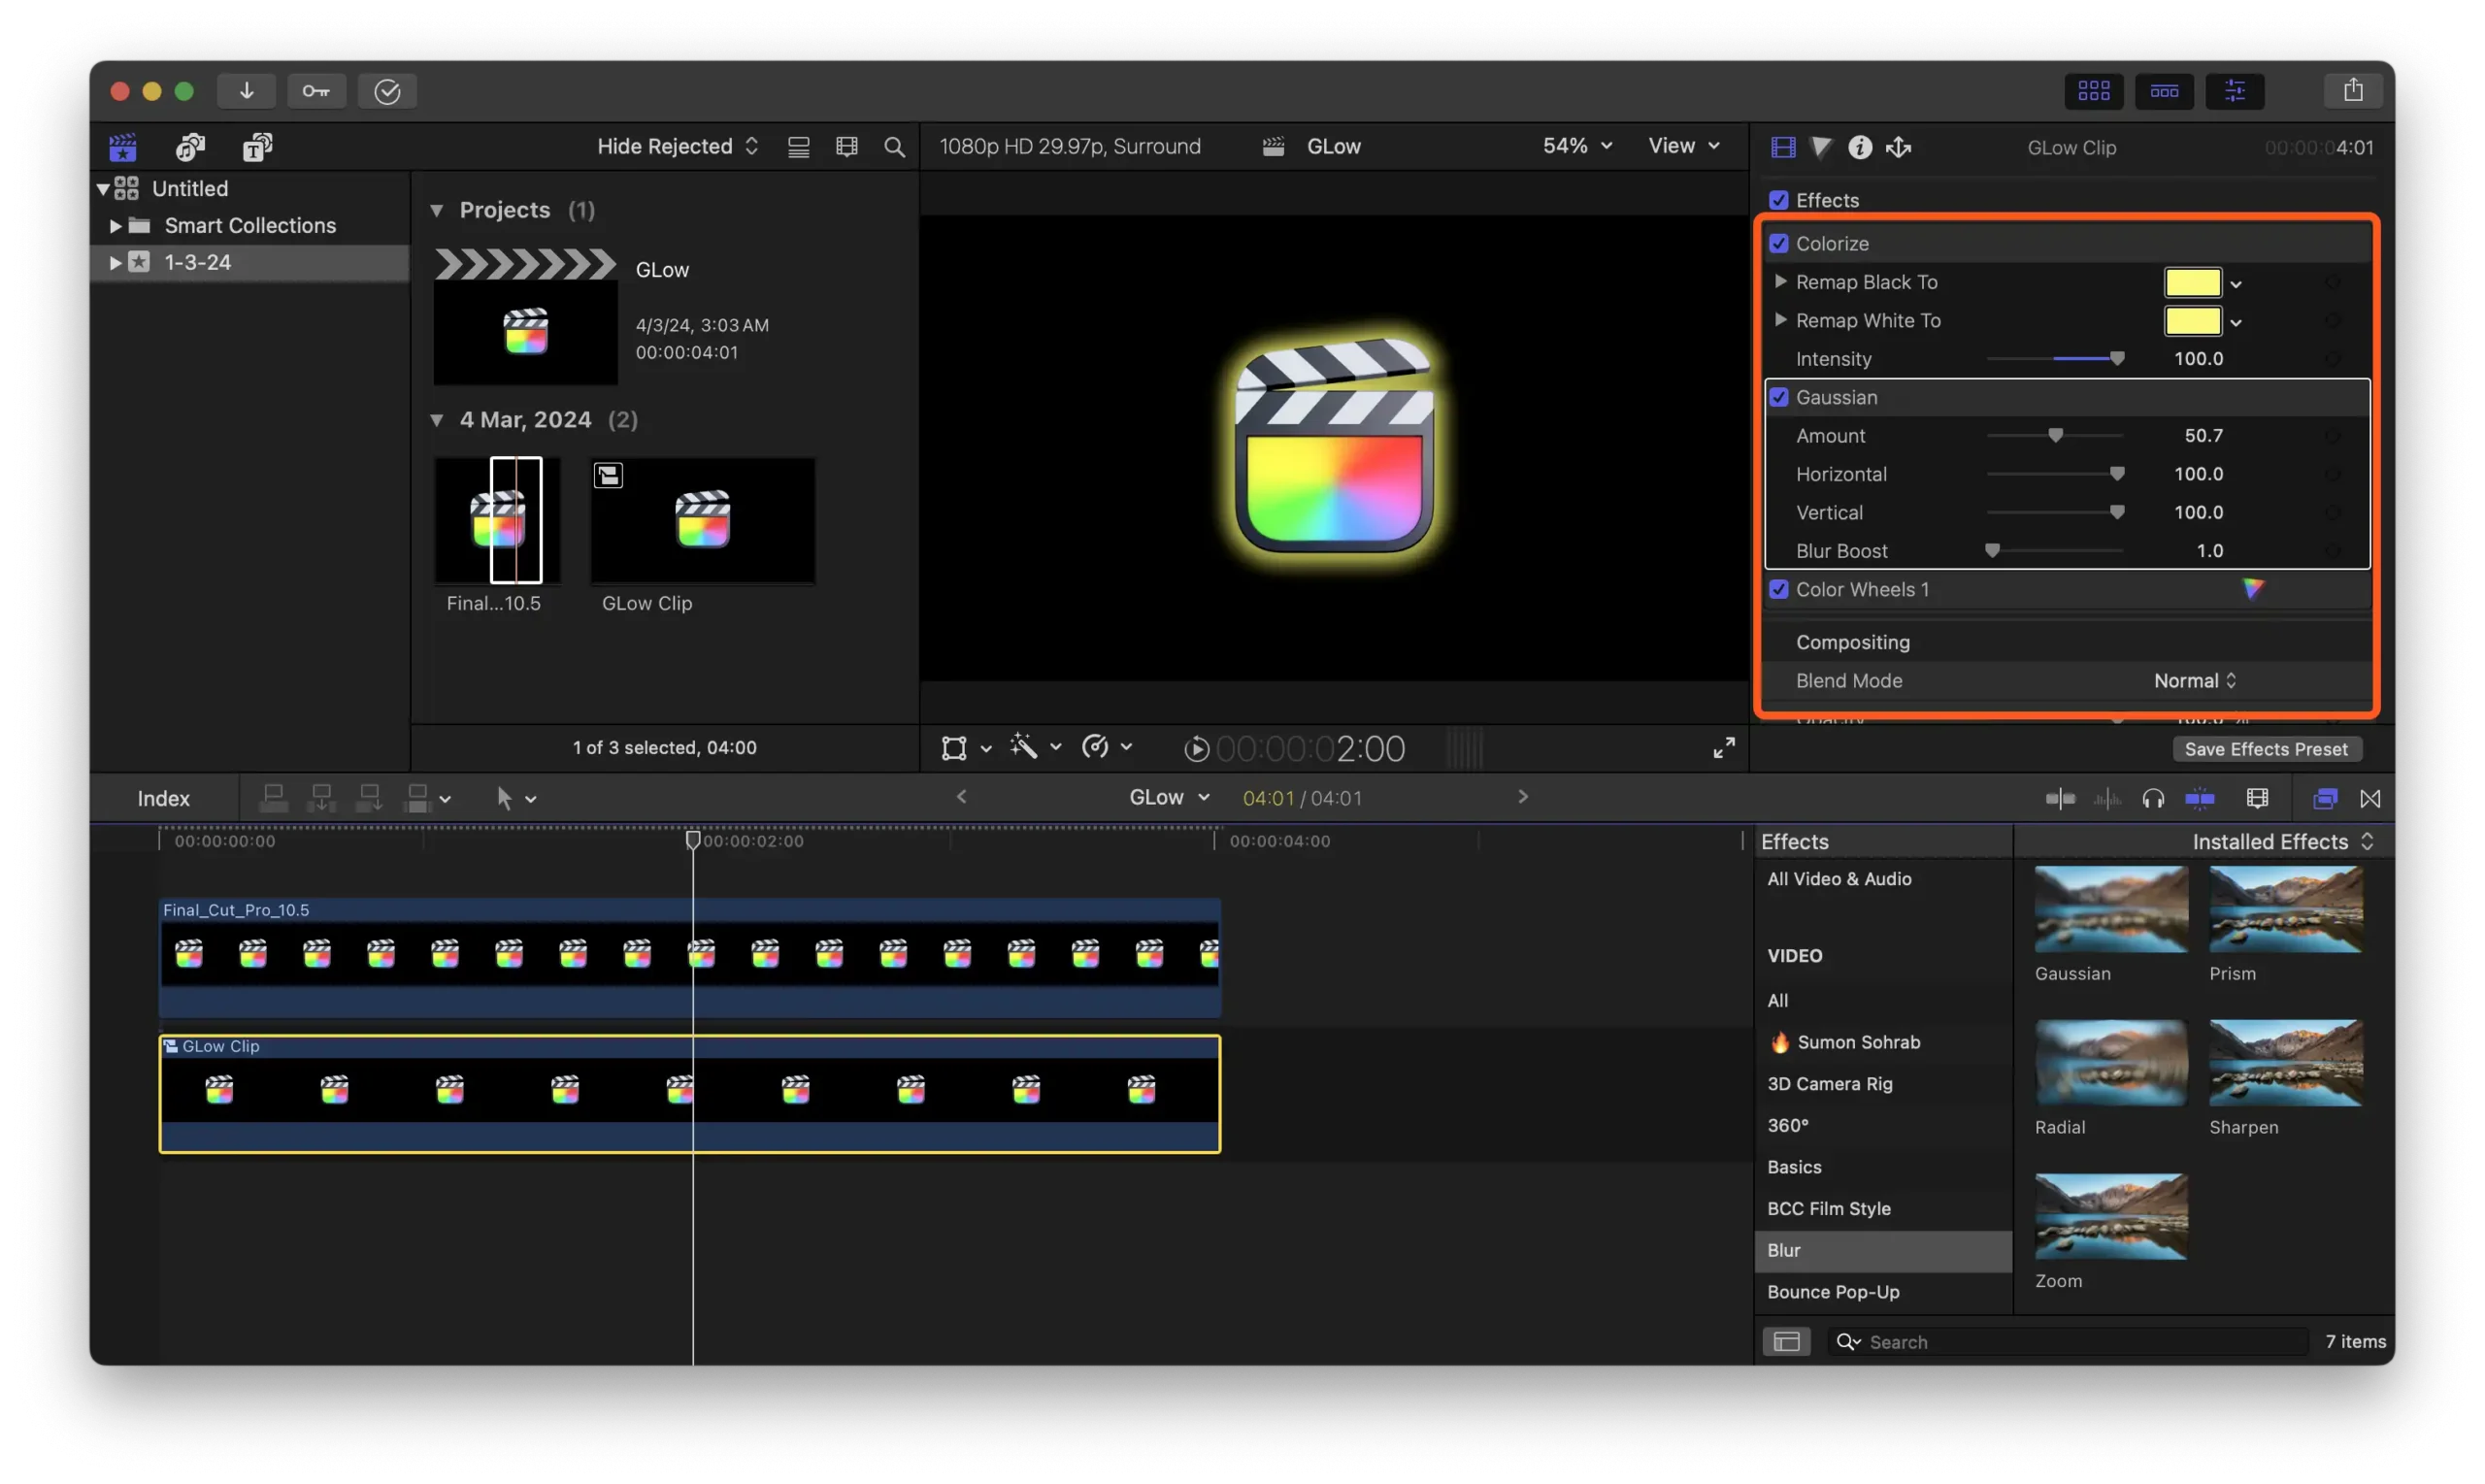
To set the bottom color well to the same color, grab the top color wall and drag and drop it over the bottom one. Bring the intensity up to 100%. To fill your icon with a selected color, add Gaussian Blur. Re-enable your top clip and adjust the amount of blur for more or less glow.
I hope this tutorial was useful; if it was, please share this tutorial. Thanks.

